Emma Hardie skincare review

I have now been using Emma Hardie products for over a year and feel I know enough about them to give an honest and informed review. I have tried most of the products in the range now and wanted to share my favourites.

IMG_2559

Emma Hardie moisturiser, primer, oil, serum by aestheticcontradiction

The most well-known product, is the Moringa cleansing balm, which has achieved almost “cult” beauty status, with hosts of bloggers reviewing it and singing its praises. I also have this and use it on days when I wear a lot of makeup, but the products I wanted to talk about today are as follows:

emma hardie moisturiser favourite by aestheticcontradiction


The amazing face protect and prime:

This is a priming moisturiser with SPF, specially formulated with Mongongo Oil, Oat Extract and Vitamin E. I use it every day.

I like that it doubles up as a primer as I don’t bother using a separate one day to day and it helps keep my BB cream in place.

 If I ever forget to apply it before my morning dog walk, I do notice the difference, my face feels dry and more exposed to the elements.

It does feel like a cross between a moisturiser and a primer when applied to the skin and has a light fragrance, which I think is a blend of rose and essential oils, similar to most Emma Hardie products.

Though I’m not crazy about the colour of the packaging, I find the pump really handy and like how sturdy it is. If I’m travelling, I just throw it in my bag and have never had any problems with leakage. I find other products with similar packaging often have a loose lid that falls off easily, meaning the pump could accidentally be compressed, covering the contents of your bag in product.

This has become my go-to moisturiser because it combines everything that I need day to day and I can easily just squeeze some on before I leave in the morning. I don’t even have to worry about screwing a lid back on properly.

Buy it: £45 from Emma Hardie

emma hardie facial oil by aestheticcontradiction blogger

Brilliance facial oil:

A moisturising and brightening oil containing 9 essential oils and 5 plant oils.

I know a lot of people say this when they first try facial oil, but I was seriously expecting it to make my skin more oily or cause me to break out. I have actually tried other oils in the past and found they did just that.

This time however, I was pleasantly surprised. I actually think this oil helps minimise breakouts, it has genuine brightening properties and leaves me skin feeling and looking smoother and more hydrated. I don’t always wake up thinking how amazing my skin looks, but it definitely happens more often after starting to use the Emma Hardie brilliance facial oil.

The packaging of this is beautiful. Even before I was sure that it would suit my skin, I wanted it to be part of my vanity display. The quality is evident in every element and the dropper is the perfect way to distribute the oil.

I was also quite surprised by the size of this and how long it lasts. I use this every two days and I estimate a 30 ml. bottle would last me a year, making the £31 totally worth it.

Buy it: £31 from SPACE NK

Emma Hardie face serum by aestheticcontradiction blogger


Mydas touch face serum:

Concentrated collagen-boosting, skin-firming face serum.

I mostly use this around my eyes and mouth, where I feel my skin is losing its elasticity or starting to form fine lines.

What I particularly love about this is that you can also add it to sensitive or spot-prone areas without fear of irritation or oiliness. It feels very light and silky on the skin and is easily absorbed.

This comes in a cylindrical box that is way too big for it. It looks impressive, but is not at all practical if you purchase it on a trip, like I did. I ended up having to ditch outer packaging because it didn’t fit in my bag.

The internal packaging, I feel is perfect and I love the chunky pen shape.

Pressing the bottom of the “pen” releases a small blob of product, ensuring there is no waste.

This is quite pricey so I use it around 3 times a week but I don’t think any more than that would be necessary.

£59, Cult Beauty


Emma hardie review favourite products by aestheticcontradiction

I hope it was useful to hear about my favourite products and how I use them. If you use any of these, I’d love to know what you think and if you use them in a similar way.

Emma Hardie also do not test their raw ingredients or finished products on animals, They do not sell to China and are in the process of having a leaping bunny logo added to their site.

IMG_2558BLOG SIGNATURE

Vidal Sassoon, Black Milk

A few months ago, I was involved in a hair presentation project at Vidal Sassoon in Manchester.

The theme was based around the darker side of nature; life-giving, but at the same time wild and dangerous.

It was put together to showcase Melanie Baker‘s hair dressing skills but also featured colour by Helen Jordan and cuts by different members of the Sassoon Manchester team.

A section of one the images from my “winter project” was used as the promo poster, after it inspired Mel to choose the theme.

11011533_10155476379630311_4081116039283491058_n


I then planned the styling, based on the theme, but also being mindful of the sassoon brand.

This shoot took place before the Vanguard collection launch, but we used some of the garments, as well as latex pieces from different collections and even some old favourites, such as veils, flower crowns and antlers.

Black Milk11691

Model: Zoe Harlotta

Black Milk11747

Model:

Black Milk11924

Model: Lia @Vauhaus

Black Milk12010

Model: Florence @J’adore

Black Milk12151

Model: Stacey Black (me)

Images and retouch: Adam Mark Williams

Make up: Jules Daniels MUA

We also had to do a catwalk and each of the hair styles was inspected and judged individually.

10956209_10155479254590311_2300718830730958078_n

All the models and Mel.

11130208_10155479081415311_245537083010047501_nThe model in their full outfits, after the catwalk.

The presentation, catwalk and photoshoot all went really well, Mel did a great job and the whole team was awesome and a pleasure to work with.

BLOG SIGNATURE


Hair story

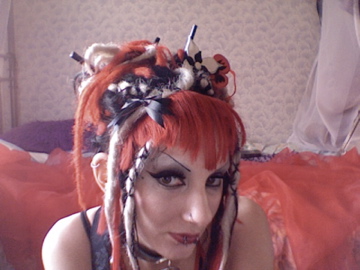
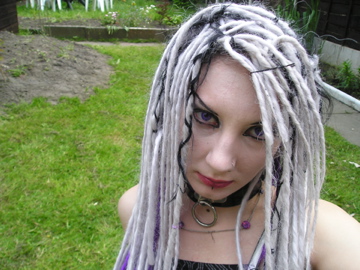
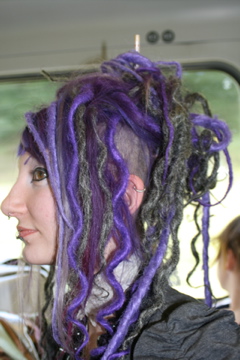
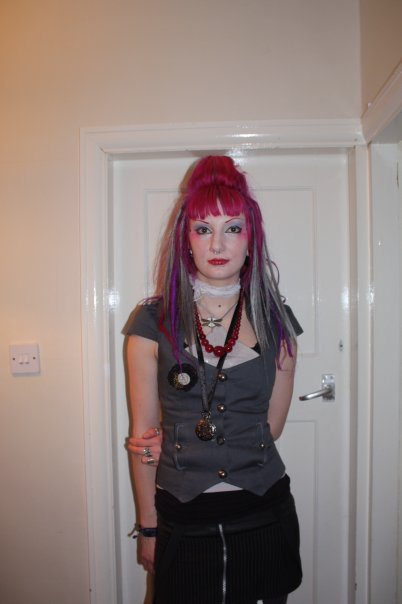
I saw Audrey Kitching do a post on how her hair had evolved since 2005 and it got me thinking about the different hairstyles I’ve had in that time. I’ve had a multitude of different real and fake hair styles over the years and decided to dip out some photos to share some of them.

cyber silver hair cyberpunk model

This is one from my first photoshoot in my college boiler room in 2005.

I used to wear a lot of fake hair but it was actually black at the time.

I used to wear a lot of fake hair but it was actually black at the time.

Photo 333

21st birthday vanity shots

Photo 400

red 21st birthday vanity shots


P1010681

first bought dreads

P1010828

first knotted fake dreads I made

P1010906

ghost in the shell hair

P1010921

skin two ball 2005 or 6

P1010959

experimenting with wool dreads

P1011339

foam, synth dreads and plastic

P1011382

rexlace fringe and dreads

273_29911960364_2730_n

short silver and purple dreads

2300_67916075364_2120_n

first time totally bleached before going lilac/grey.

IMG_0676

chopsticks bun dreads phase

273_29911990364_4616_n

purple backcombed mullet

273_29912000364_5311_n

puple weft extensions

307_33843532246_9319_n

grey and purple curly and straight dreads

6171_1226439821238_5154779_n

natural hair and dreads

2070_59963470521_2932_n

purple fringe and dreads

762_36404362172_2910_n

plum and purple

762_36404222172_3659_n

purple mess

762_36404512172_4876_n

purple bob

793_1079485827480_3148_n

purple synth dreads and fringe

1971_59646615364_2070_n

purple concave bob

1971_59646635364_2620_n

purple and blond victory rolls

1971_59646665364_4247_n

curly dreads

4720_1187349764011_7567171_n

white and lilac curly dreads

9132_1217355201614_1636297_n

lilac dreads

331_24662973943_8083_n

dreads and weft extensions

IMG_5433

dreads and undercut

IMG_0630

curly dreads

IMG_8300

white curly dreads

IMG_0312

dreads with nut beads

197402_1968013806543_4795491_n

purple hair rolls

2300_67912195364_7091_n

rose red weft extensions

2850_97469735364_1871674_n

rose red hair with salt and pepper weft.

DSC_3068

dread bun with plastic fringe

31413_398232984726_272070_n

white bob

8818_194434010364_194319_n

curly weft

11133_203132030521_7241305_n

all the fake hair

17345_408635240264_8086517_n

red and curly wefts

26279_1434532381266_7860410_n

mini crimped

26307_405934910364_2940372_n

pinned up

10424_171508905364_3072048_n

grey weft

29166_434346325179_7831853_n

black and white curly weft

17160_280050545179_4738118_n

rolls and weft

23539_418362900364_41216_n

buns

76111_495937510364_7067651_n

short roll

25894_419390855179_5683555_n

grey bob

38295_450694645364_4061480_n

white bob

36227_447760025364_6706167_n

curls and pug

68776_484714920179_2147322_n

backcombed

193038_10150114231326317_5994960_o

shaved side

272021_10150304266815365_6519139_o

lilac and purple by toria brightside

263587_10150312516095365_1312729_n

all up by neil lewis

Photo 148

crimped

252510_10150285439815365_7699105_n

lilac up-do

579535_10150825145625365_507709428_n

backcombed

546094_10150952533740365_1094723478_n

deathhawk

392084_10150556216295365_1138638294_n

roll plait

262199_10150342140254447_4101464_n

troll

225782_1960681370308_2199566_n

curls

182456_10150101095867173_2278460_n

mono-roll

300220_10150420733606224_805384833_n

more extensions

253752_10150285441565365_5107244_n

double braids

188727_935293963219_8131885_n

silver and grey

303847_10150394699520365_798884661_n

fluffy

740767_10151361348450365_34824731_o

black fringe

545137_3928890180808_2118631976_n

lilac and white extensions

465533_297446777015002_1056372493_o

pink by jennifer byron

338167_10150556237940365_1165397744_o

white crimped

8

transitional dip dye by emily bailey

21812_10151312589590365_1627216125_n

braids and shaved

406686_425637937503344_96454740_n

black dip dye by jennifer byron

988527_10151667267920365_1722518678_n

1375064_564442596951489_1825898665_n fishtail

IMG_1689

light blue

piercing red 1

rope braids

glasses 5

turquoise

This is just a selection of my hairstyle pictures. The sizes are a bit all over the place but I didn’t want to exclude the smaller ones.

Some people think it’s embarrassing to upload old photos but I think it’s fun to remember past hair and style, as well as the memories that come with it.

I hope you enjoyed looking through my hair story.

BLOG SIGNATURE


How to: Bleaching and dying for pastel hair.

I’ve always bleached my roots myself and never really stopped to think if that was unusual or something many people are scared to do. Last week I attended a hair-dressing event and the stylists I was working with seemed impressed but also a little horrified that I would attempt something as dangerous as bleaching my longish, blueish (direct quote) hair myself without fear of it all falling off.

I know there are millions of hair tutorials and tips available online but I was re-dyeing my hair last week and decided to take some pictures and share what I do. I included the bit at the end with the colouring, just in case anybody isn’t familiar with the conditioner trick.

IMG_5497So fist of all you need to mix the bleach. I use a powder bleach and a 9% peroxide. If you only need to lighten your hair slightly you can probably use a 6% and there is also a 12% but I wouldn’t recommend using this on your own unless you know your hair is very thick and hardy as it could easily cause snappage.

IMG_5498I use two mirrors to do my hair so I can easily see the back and make sure I haven’t missed any bits out.

IMG_5499Tie up the top part of your hair and brush out the bottom section.

diy bleachingYou should be able to clearly see a section of root that needs bleaching.

how to bleach hair yourselfStart applying the bleach using a brush. I always start at the bottom and work my way up as the top of the head doesn’t require as much development time.

IMG_5507Look closely to make sure you don’t miss any bits but be aware that the colour doesn’t lift instantly.

IMG_5509When touching up your roots, try not to overlap the bleached areas too much as it may cause damage to your hair.

IMG_5510Use a comb to section the hair. Straight sections will make it easier to apply the bleach and know where you are up to.

IMG_5512For the bottom layers, I bleach around the head in a semi circle, one layer at a time. This is the last section I treat this way.

IMG_5514The remaining hair is considered the “top section”.

IMG_5516Separate it from the rest of the hair.

IMG_5517Section the hair and bleach one at a time

IMG_5519Try to keep the partitions as straight as possible.

IMG_5520Move your way across the head, from one side to the other.

IMG_5523When you have covered all dark areas, leave it to develop. The time varies depending on the colour you are trying to achieve. I dye my hair very light colours so I wait for it to go a light blond, which takes about 40 mins.

IMG_5526This is what it looks like when I rinse out the bleach.

IMG_5527In the next step, I add the colour. I use mainly directions, but you can try this technique with any semi-permanent hair dye. You will need a bowl of conditioner and the colour(s) you want to add to it. I hardly ever use just one colour as I like to mix my own shade. This time I’m using turquoise and violet.

IMG_5528I have been using these two pots for a few months now but this time I’m adding slightly more turquoise for a slightly more vibrant result.

IMG_5531When mixed, it looks like this.

IMG_5533Section the hair as before and start applying the dye mixture.

IMG_5534Make sure to coat the hair as evenly as possible.

IMG_5536When coated, leave for at least 20mins. If you only used a tiny bit of dye you can even sleep with it on all night. I leave it in for different amounts of time depending on the shade and effect I’m going for.

IMG_5537After rinsing it out and drying your hair you should have a nice pale colour. Newly bleached roots often absorb more colour but it usually balances out after a few washes.

Please let me know if you found this useful or have any questions.

BLOG SIGNATURE


Current Obsessions #19


current obsessions 19This week I’ve mostly been thinking about forests, painting my walls grey, something interesting to do with the large but disused fireplace space and interesting ways to display my products in the show room.

I’m also trying to decide what to do with my hair for NYE tomorrow night and if I should keep “Current Obsessions” on a feature next year or replace it with something else. Please let me know if you have any suggestions!

BLOG SIGNATURE